Just some personal observations on clock photography from several decades of activity as a hobby: Feel completely free to disagree or ignore my advice.
 Photography of anything against a white background is very difficult because the camera is confused by the brightness of the background. You could try using a central spot option for exposure and focus in your camera menus. Otherwise you will usually get a very dark image totally devoid of detail. A large piece of plain brown packaging cardboard, plywood or hardboard as a background helps to bring out the fine details of any object. All thanks to the neutral colour, its low brightness and low surface reflectivity. Light-darkened natural pine boards and mat-painted plywoods also work well as backgrounds if not too light in colour, glossy or highly varnished. You might get away with a neutral throw cloth to kill the bright background if appropriate.
Distracting objects in the background are a real problem when sharing images online or with fellow collectors. A neutral background board or even a piece of neutral plain cloth can effortlessly hide a multitude of sins from the camera. Even quite a large board can be easily stored out of the way against a wall without taking up any room at all.
Here is an example of a distracting background almost concealing the detail of a fascinating early WT movement prior to restoration. I have only used it because I have no other image which better demonstrates this problem. This is certainly not intended as a criticism of the owner as a photographer. Not at all. I was very grateful for his images of such an interesting object. He had no reason to "improve" his images for my sake and it would have been rude to ask him to retake the pictures with a neutral background.
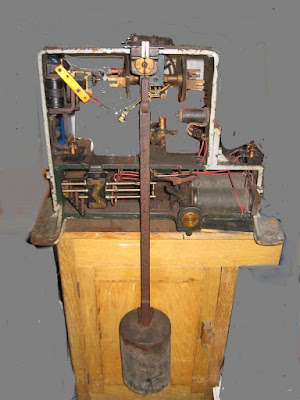 Five minutes with PhotoFiltre roughly painting out the background with a broad brush is not going to offer anything like visual perfection. But gives an idea of how a neutral background can lift an image of a technical subject. A board or cloth hiding the background when you are taking your own images will make your pictures look far more professional even for your own enjoyment. It soon becomes a habit to look at the background before taking any photograph if you practice for while, reminding yourself to check each time.
Below is an image of my WT sitting in the workshop with a rack of (very) untidy shelves right behind it. I simply propped up a handy piece of plywood behind the movement before taking the photograph. Then I cropped the image and gave it a slightly more flattering appearance using PhotoFiltre software. The enlarged image is full screen and 3o0KB so you may choose not to click on this particular image if you still have a slow connection.
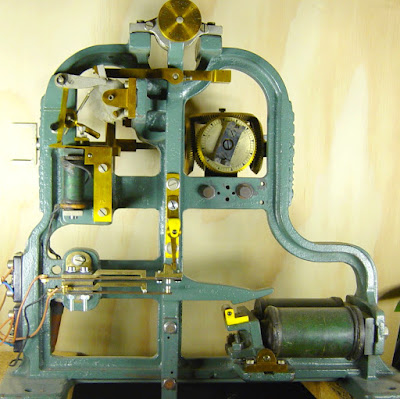 Smaller objects can be captured in a cardboard box lid or wooden tray. I often use the greenhouse-conservatory for photographing small objects because the white roof blinds give a perfectly even light. Though only until I block the light with my head and camera. Sometimes flash helps even here. I usually try with and without flash and usually from a distance using zoom. Macro shots are often a difficult choice between closeness to the object, magnification required, depth of field and varying the zoom factor. The wonderful thing about digital photography is that you can can try every imaginable option in a matter of a minute or two and see the results immediately.
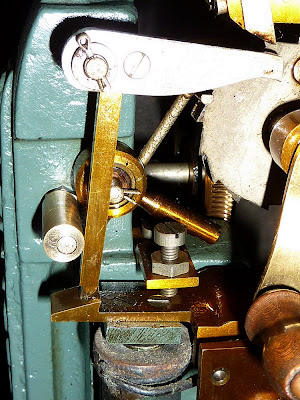 If flash is to be used then I find it is far better to move well back and use the zoom to frame the object. The flash then gets a chance to spread evenly across larger objects. The camera will usually adjust the intensity automatically for you. Avoiding head-on flash is best to avoid burnt out highlights on flat surfaces which directly reflect the flash back to the camera. Move slightly to the side to avoid direct reflections in glossy surfaces. Change the angle repeatedly and keep trying shots to see which works best. Often one would prefer to photograph a clock "face on" but it is rarely possible unless there is abundant natural light. Many clocks are often in poor natural light and require flash for any detail to be seen at all. I usually photograph master clock movements from a minimum of 3-5 feet away using flash and zoom to frame the area I want to capture.
Capturing the entire case length of an English master clock or long case clock would require a very distant shot. Careful cropping with image handling software can be quite dramatic. Raise yourself to the height of the dial for best effect. Photographing a long case clock from a low viewpoint will often distort the appearance of the clock or its dial. The problem with being on the same level if that flash will reflect in the dial glass so try above and below shots to avoid a direct reflection. Distance helps too in spreading the flash as evenly as possible. Varnished or highly polished wood will often look quite ugly if the camera catches the light of the flash as a direct reflection. So keep moving about slightly and vary your distance if you can. Keep checking the screen or download your trial images if you are at home.
A distant view often suits turret clocks if you can pull back at all. Getting too close produces pretty shots of distinct areas of the movement but lacks the drama, detail and completeness of the whole movement. The human eye is far more skilled at zooming in than any digital camera. Taking close shots of such large objects inevitably throws large areas of the mechanism out of focus. A distant shot places almost everything in focus simultaneously. Provided of course that you can hold the camera still enough. Or use flash to do it for you where possible. Again using the zoom lens to frame your subject, taking several shots and carefully reviewing your results on the camera screen before leaving.
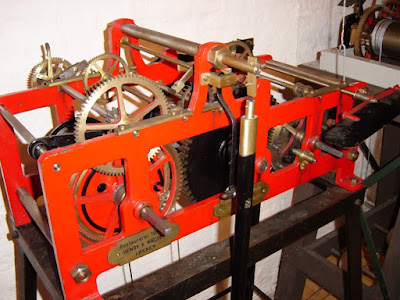
I always take twenty shots of an interesting object with a digital camera where only one would do with film. I keep moving around slightly between taking pictures. Final selection is then possible from large images on your computer screen to find the best obtained. Taking lots of photographs is a hard habit to break from film photography where the cost of processing and the limited number of prints per film made one far more careful. With film, one can never be certain that an object has been captured sharply and framed perfectly in the best possible light. Digital photography gives this wonderful freedom with almost instant access to the results on one's own computer screen. Or even, there and then, on the camera screen if it large enough to see anything useful.
If you are away from home then always review your images on the camera screen before moving on. You could save your embarrassment of having photographed a colourful subject in sepia or monochrome due to a clumsy touch of a button selection in the menu. A large camera screen is a huge advantage here. I took a number of photographs of a colourful cathedral organ with my brand new Canon digital camera. Only to find when I eventually arrived home that I had somehow selected a strange colour option of sepia monochrome with gold highlights! Hmm.
I like compact cameras with a screen almost the entire size of the back plate. Just make sure the entire screen area is active before you buy! Some camera makers cheat and have hidden screen frames which only appear when the screen is lit. Naughty! Better cameras seem to have much better low light ability and are reset to take the next shot far more quickly. Online and magazine reviews are invaluable here in selecting from the incredible choice of cameras on the market today.
I wish compact digital cameras were made much lighter and thinner to go in a normal pocket. Simply because I carry a camera with me everywhere. No doubt the retractable zoom lens makes the manufacture of thin cameras more difficult. Progress in the compact digital camera field is simply amazing with older cameras looking and feeling rather like clunky travelling trunks against the slim briefcases of the present crop of cameras. Metal may make a camera look better value or even more substantial but I'll settle for something lighter if possible. Heavy cameras are throwback to Nikon film SLRs which needed a sack truck or wheelbarrow to haul them about for any distance.
I have not dabbled with digital SLRs having spent decades dragging film SLRs around. The bulk and weight are a bore and quickly draw attention to the fact that you are using a camera in a public space. Such large cameras are threatening to many people. I now prefer digital compact cameras. Held at arms length they seem more of an extension to one's arm. One could simply be pointing out something of interest. People don't seem to notice or simply don't care these days. Holding a huge black SLR box up to your face with cannon of a lens hanging off the front is going to draw far more attention.
Hopefully organic screens will offer further improvements in weight and compactness as they have on mobile telephones. These camera phones are now driving the digital imaging market. No doubt the compact cameras will continue to enjoy a trickle down effect of the better features from the phones.
Do not allow your shadow or reflection to be seen your photographs. There is nothing worse than the sight of a grimacing photographer being perfectly reflected in all their gory detail in the glass of a clock case or dial. Except perhaps when the reflection of the photographer is inadequately dressed because they think they are invisible behind the camera at home on a hot and sunny day. Stand off to the side of flat glass to avoid being caught in the reflection. Or open the glass door if appropriate and where possible. Moving back and using the zoom lens (if you can) helps here too. Your light coloured reflection will often make the clock behind the glass completely invisible! While a dark background reflection will expose it in all its glorious detail. So look around for an angle which will offer a suitable reflection in the glass to make it appear transparent. A willing slave holding up a dark coat might work even better if you have both handy. Failing that dress completely in black like something out of a war action film and take your chances. Removing the gloves and balaclava after taking your shots will help to avoid arrest if you are out and about.
It is incredibly difficult to avoid reflections in convex glass. At home I have control and freedoms not available in the public space. I found that hanging a dark cloth off to the other side of the object and behind the camera allowed the glass to drop considerably in its reflectivity. This allows clock hands and dials to be seen clearly behind convex glass. A rather dark board pierced to allow just the the extended camera lens to peep through would no doubt allow a head-on shot of a difficult subject behind (even convex) glass provided flash is *not* used. A tripod would no doubt improve the chances of success considerably when using this idea. I haven't tried it yet but offer it as an idea.
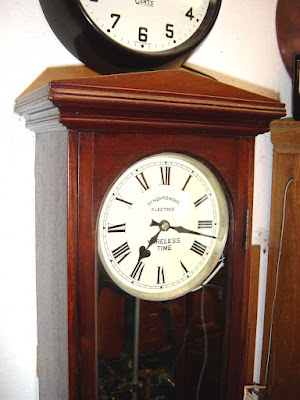 Here's a clock for which Barrie needed an image for his online clock museum. I could hardly send him this one could I? I often use free software called PhotoFiltre to crop, resize and process my images from my picture files after I have downloaded them from my cameras. It makes so much difference to prepare one's images before posting them online. This excellent software has enormous potential to improve one's images without struggling up a steep learning curve. The screen process symbols are self-explanatory and easily followed. Any false moves are easily undone up to a number of stages backwards in the processing chain. Highly recommended for those unwilling to spend the time to learn to use professional imaging processing software. Not to mention the huge outlay usually involved. If you have free bundled alternative software in a package by all means use what you have available.
Exactly 100 images later and having tried every imaginable combination of lighting, flash, distance and angle, I finally had something I thought could "improve" with PhotoFiltre. I brushed out the distracting background and played with cropping, contrast, colour, gamma and brightness. I think you'll agree that it was worth the effort to capture the clock in its best light. Only the false pediment held real interest for this particular shot. The idea was to clearly show that the false pediment was a simple decorative triangle. The dial appears far more yellow/cream than it does in daylight but this is only a small point as it does not spoil the image. The wonderful colour of the polished mahogany is brought out quite well. It is hard to believe that this case had been painted with several thick coats of gloss white paint before it was purchased. I used a cabinet scraper to get most of it off. Then I applied many coats of button polish with block backed sanding by hand in between.
Backup your images regularly onto DVDs to avoid the disaster of a hard drive crashing. Mine has just died after seven years of stuffing it with images! Despite having a second large hard drive in the computer most were unreadable. With around 12 gigabytes of images stored on many unreadable sectors. I was (nearly) saved by a backup DVD of my images which I had quite forgotten about. Though I lost many hundreds of images from the last four months before the crash. I was far too lax about backing up my images onto disks. Because I had so many images it always needed at least two DVD RWs each time to cope with the sheer volume. As I take one of my compact digital camera with me everywhere I had built up well over ten thousand images. It is easy to forget about image backups and then lose images which can never be recovered. Nor retaken in the event of a hard drive crash. I never thought it would happen to me either.
Take images using the higher resolution settings in your digital camera menus. Larger image files do fill memory cards quite quickly but these cards are remarkably cheap and keep getting cheaper all the time. Buy two medium, rather than one huge capacity, memory card. Smaller image sizes simply don't stand up to enlargement. Which means all the fine details are fuzzy. Once taken, most pictures can never (ever) be repeated. One day you will want to read the fine print of the label, the sign, or the notice in the background of one of your images. Or want to examine an object you never noticed when you took the photograph. It is only after the event that you discover that fuzzy is just not good enough to be able to read the opening times of a museum, gallery or shop before setting out in the car on a long journey to retake your pictures in a much higher resolution. When you do get back there you find there is no sun, too much sun, it is in the wrong place, the trees have grown leaves or lost them, or the conditions have changed completely for some other reason.
Click on any image for an enlargement. Back click to return to the text.
*


4 comments:
Great blog !!!!!!
Great hobby
Daniel Sanchez from Venice, Italy
Thankyou, Daniel.
Regards
Chris
this is beautifull information that totally opened my eyes thank you. i am part on a mechanical engineering diploma group in trinidad west indies who have been assigned to repair this exact clock in the clock tower above our school.there was no information found about this clock found other than ur very detailed an appreciated blog. please contact deueldelisle@gmail.com
Again I am sorry that I missed your comments. I only see comments if I list all the chapters together for editing. (which is not often) Thankyou for your kind comments and good luck with your project.
Post a Comment